Change Web Hosting Service: Step-by-Step Migration Guide
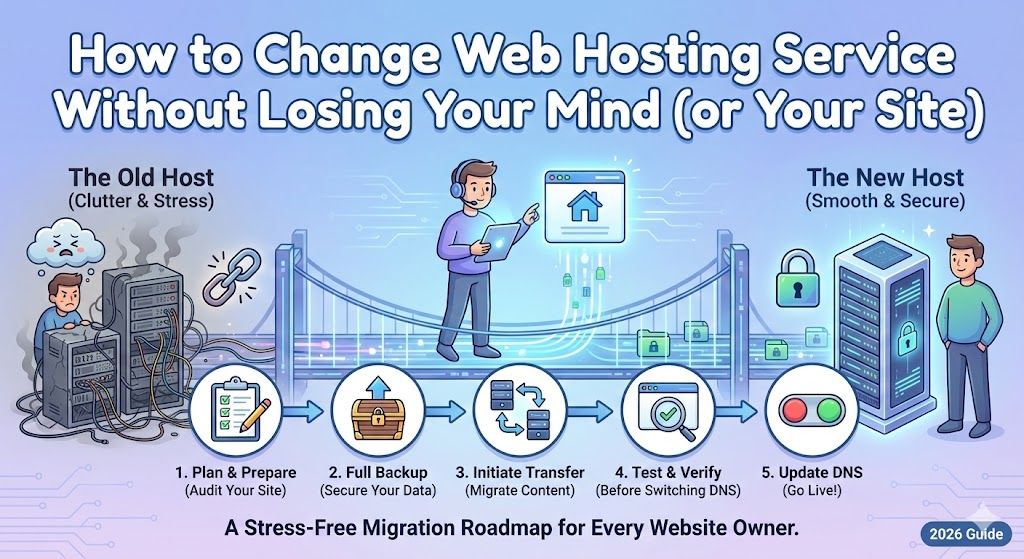
How to Change Web Hosting Service Without Losing Your Mind (or Your Site)
So, you're considering a switch, maybe you're tired of sluggish load times, sky-high renewal invoices, or support that ghosts you harder than your Tinder date. Look, I've been there. Changing your web hosting service can feel like moving apartments: fraught with boxes (er, files), secret coding corners you forgot about, and that lurking terror you'll miss a payment or, worse, break something. But trust me, with a little planning (and maybe some coffee… okay, a LOT), you can pull off a web host migration smoothly, without downtime, lost emails, or the kind of meltdowns usually reserved for assembling IKEA furniture. Grab your checklist, and let's do this together.
Key Takeaways
- Changing your web hosting service is often necessary due to performance, cost, support, security, or scalability issues.
- To successfully change web hosting service, follow a thorough step-by-step process: audit your site, create backups, prepare both the old and new environments, and carefully migrate files, databases, and emails.
- Minimize downtime during the switch by lowering DNS TTL, performing comprehensive testing before and after migration, and keeping old hosting live until everything is confirmed working.
- Don’t forget SEO, analytics, and email deliverability settings;re-verify in Google Search Console, update DNS records, and check forms and redirects post-migration.
- Investing in security, ongoing monitoring, and proper backup practices ensures your site stays safe, fast, and reliable after switching web hosting services.

Start fast with Shared Web Hosting
The simplest, most affordable way to get online. Includes SSL, CDN, and solid performance.
Browse plansWhen and Why to Change Web Hosting Service
Common reasons: performance, cost, support, security, scalability
Let's cut straight to it, most folks change hosting for one of these classic reasons:
- Performance: Your site loads slower than a downtown traffic jam. Users bounce, and you know Google is frowning.
- Cost: Intro specials end, and suddenly, your $2/month deal morphs into $20/month.
- Support: Ever had a support ticket disappear into the void? Weekend outages with no callback? Then you know.
- Security: Maybe your host shrugs at security. (No bueno, especially if you handle user data or take payments.)
- Scalability: Woohoo, your site's getting traffic… and then, bam, you're hitting CPU limits or seeing mysterious errors.
A quick story: I once stuck with a budget host for years, thinking, "Eh, it's fine." When I finally switched? My traffic, and sanity, both improved.
How to know it's time: signs your host is holding you back
Still on the fence? Watch for these warning signs:
- Mysterious Downtimes: You learn about outages from angry DMs on Twitter.
- Support Woes: Help tickets that age like fine wine.
- Hidden Fees: Sneaky charges or surprise renewal hikes.
- Resource Bottlenecks: You're always bumping up against bandwidth, memory, or CPU limits.
- Security Gaps: Frequent malware issues, or lax patching history.
If any of these sound familiar, don't ignore them, your host might be the bottleneck stalling your site (and biz.).
How to Change Web Hosting Service (Step-by-Step)
Changing hosts isn't just clicking a button. But if you break it into steps, it's definitely manageable (and even fun, OK, maybe that's just me). Let's start.
Step 1, Choose the right new hosting provider
Compare hosting types: shared, VPS, managed, dedicated, cloud
It's not just about picking a pretty logo. Your hosting flavor matters:
| Type | Best for | Price Range | Notes |
|---|---|---|---|
| Shared | Blogs, hobby sites | $2–$10/mo | Cheapest, but shared resources. |
| VPS | Growing businesses | $10–$60/mo | More control/resources. |
| Managed | Non-coders, WP users | $20–$80/mo | Support handles backend. |
| Dedicated | Big traffic, custom setups | $80–$300/mo | You get a whole server. |
| Cloud | Scalability, apps | Varies ($5+) | Pay-as-you-use, flexible. |
I've bounced from shared (Devoster, Bluehost) to fancy pants cloud (AWS), but for most folks? VPS or managed is often the sweet spot.
Key selection criteria: performance, security, backups, support, pricing
Don't be dazzled by shiny dashboards, look for:
- Performance: Fast SSDs, decent RAM, solid-state everything.
- Security: SSLs, DDoS protection, real firewalls.
- Backups: Offsite, auto, and ideally daily (not just weekly.).
- Support: 24/7 live chat (bonus: phone support).
- Pricing: Watch for renewal rates, not just the sticker price.
Checklist: questions to ask potential hosts (SLA, backups, migration support)
Before forking over your cash, quiz your shortlist:
- What's your SLA (Service Level Agreement) uptime guarantee?
- Are backups included, how often?
- Free migrations? Partial, full, or none?
- What are your hardware specs?
- Can I scale up without a move later?
Pro Tip: Some hosts (like Devoster and SiteGround) include free migration for new customers. That's a sanity-saver.
Step 2: Prepare and Audit Your Current Site
Before you bail on your old host, take stock. Missing files now = headaches later.
Inventory: files, databases, DNS records, email accounts, SSLs, cron jobs
- Files: Web root (public_html), media, images, custom scripts
- Databases: Usually MySQL (for WordPress, Drupal, Joomla, etc.)
- DNS Records: A, MX, TXT, anything custom for emails or SaaS tools
- Email Accounts: List every address, even the old ones ("info@" always bites you)
- SSL Certs: Grab the private keys or certs if self-installed
- Cron Jobs: Scheduled tasks, like backups or newsletter mailings (check your panel)
I once forgot to document scheduled ecommerce feeds, cue panicked client call. (Don't be me.)
Compatibility checks: PHP/MySQL versions, extensions, storage and resource needs
Double-check your app's requirements:
- What version of PHP is running? (7.4, 8.x, etc.)
- Do you need specific PHP extensions (e.g., ionCube, GD)?
- Database version? Are you using special triggers or JSON columns?
- Storage, are you nearly full? Does the new host offer more?
- Bandwidth: Monthly traffic? CDNs honored?
One time, I upgraded to a new host and my site spat out syntax errors. Turns out, my code was allergic to PHP 8.0. Lesson: check everything.
Step 3: Backup Everything (Files, DBs, Email and Configs)
Nothing kills a Sunday like realizing your backup is missing. Here's how to cover your butt before migrating.
How to export files (FTP/SFTP, rsync, control panel)
FTP/SFTP: Grab FileZilla (free), connect with your old host's credentials, and drag-drop your site files locally. It's as glam as it sounds.
rsync: If your host allows SSH access, try:
rsync -avz user@oldhost:/home/account/public_html/ ./backup-folder/Control panel: Most panels (cPanel, Plesk, Devoster's custom dashboard) have a "File Manager" to zip and download whole folders.
How to export databases (phpMyAdmin, mysqldump, managed DB export)
phpMyAdmin: Log in, select your DB, click Export. Choose "Custom" if you want gzipped.
mysqldump: Nerdier, but super reliable:
mysqldump -u username -p dbname > backup.sqlManaged DBs: Some hosts have a one-click export tool (Devoster's UI is surprisingly friendly for this.).
Backing up email (IMAP sync, export tools)
IMAP sync: Use Thunderbird or Outlook, connect both old and new servers, drag folders over.
Export tools: Some hosts let you export whole mailboxes (.mbox or .eml files), check their docs.
Trust me, do separate backups: one local, one in the cloud. Peace of mind, my friend.
Step 4: Prepare New Hosting Environment
Now for the blank slate feeling: your shiny new host is ready. But before uploading files, let's do the plumbing.
Create accounts, databases, users, correct permissions
- Open your new host's panel (Devoster, SiteGround, etc.).
- Create any sites, subdomains, or staging areas.
- Add fresh databases and users, mirror what you had before.
- Set strong passwords. Please.
- Double-check permissions. Don't give all-powerful access to every account.
Install required runtime and extensions (PHP, Node, certs)
- Is PHP the right version?
- Are critical extensions enabled?
- Node.js, Ruby, or Python, if your app needs ‘em, install now.
- SSL: If you've got an SSL from your old host, prep for transfer or just generate a new Let's Encrypt cert.
Make a checklist, don't trust your memory (mine's failed me big time here before).
Step 5: Migrate Files and Databases
Deep breath, let's move the digital furniture.
Manual migration: FTP/SFTP, rsync, SSH commands (examples)
FTP/SFTP: Upload everything you downloaded earlier. (Pro tip: Always upload outside peak hours. It's faster.)
rsync: Example command:
rsync -avz ./backup-folder/ user@newhost:/home/account/public_html/SSH: Run scp or even tar up your site and decompress on the server if allowed.
Database import steps and troubleshooting common errors
phpMyAdmin: Use Import tab. If your file is huge, ask your host to up upload limits.
mysqldump:
mysql -u username -p dbname < backup.sqlErrors: Watch for "max_packet_size" errors (edit my.cnf if needed), or collation/version mismatches.
Using automation: host migration tools, WordPress plugins, managed migrations
Most major hosts (Devoster, SiteGround, A2) offer automated tools that take care of everything (for real).
WordPress? Try Duplicator, UpdraftPlus, or All-in-One WP Migration.
Paid migrations: If you're worried, pay the hosting provider (Devoster's white-glove migration is very hands-off).
Step 6: Migrate Email and Deliverability Settings
Let's not forget email, unless you like missing invoices and annoyed clients.
Move mailboxes (IMAP sync methods) and recreate accounts
- Set up identical mailboxes on your new host.
- Use IMAP sync tools (like imapsync) or manual drag-and-drop in your mail client to copy emails over.
- Don't delete anything from the old host yet, double-check everything arrives.
Update MX records, SPF, DKIM and DMARC to preserve deliverability
These DNS records tell the world (and Gmail's spam police) you're legit:
- MX: Points mail to your new host
- SPF: Authorizes servers to send mail for your domain
- DKIM: Digitally signs outgoing emails
- DMARC: Tells receivers what to do with non-compliant emails
Double-check spelling, one typo and your emails vanish into the ether.
Step 7: SSL, Certificates and HTTPS Setup
No browser likes the dreaded "NOT SECURE" badge. Let's stay legit.
Export/import existing certificates or issue new Let's Encrypt certs
If you bought an SSL cert, export private key, public key, and bundle. Most hosts (including Devoster) have import wizards.
Or, just get a free Let's Encrypt cert, automated, renews itself, and works for 99% of sites.
Mixed-content checks and force-HTTPS redirects
Crawl your site for HTTP links (free tools: WhyNoPadlock, SSL Labs, Screaming Frog).
Add force-HTTPS rules in .htaccess or your host's dashboard.
A single HTTP image can trip security warnings, so track them down early.
Step 8: DNS Switch: Lower TTL, Update Records, and Go Live
DNS, where most mishaps (and coffee-binge nights) happen. But you'll be calm if you prep first:
DNS TTL best practices and timeline examples
Lower TTL (Time to Live) on key DNS records to 300 seconds (5 minutes) 24-48 hours before switching. This lets changes propagate faster.
On big ecommerce sites, I've set TTL down to 60 seconds for extra agility during go-live windows.
Updating A, AAAA, CNAME and nameserver changes, when to use each
A record: Points your domain to your new server's IPv4 address.
AAAA record: For IPv6 users: same idea, new digits.
CNAME: Use for www/non-www or subdomains.
Nameserver: Points all DNS to new host, big step, use when you want to move everything, not just web/email.
After updating, grab a snack, and obsessively check DNS with tools like whatsmydns.net or dig.
Step 9: Test Thoroughly Before and After the Switch
You made it. (Almost.) Let's make sure nothing's borked.
Staging/testing methods: hosts file, preview URLs, staging subdomain
Edit hosts file on your laptop to preview the new site before public DNS changes.
Use preview URLs (Devoster and others provide these) to view the site on the new host.
Staging subdomain: Great for final checks (e.g., staging.yourdomain.com)
Functional tests: pages, forms, payments, uploads, email send/receive
Click every major page and form, twice.
Run a test purchase or form submission.
Check file uploads/downloads.
Test both sending and receiving email. (Pro tip: Try from multiple providers, Gmail, Outlook, etc.)
Ask a friend to click around too, they'll spot weirdness you'd miss after too many hours staring at code.
Special Migration Guides (Site Types and Panels)
Not all sites migrate the same. Here's a rapid-fire breakdown by flavor:
WordPress-specific migration (plugins, serialized data, search-replace)
Use migration plugins (Duplicator, All-in-One WP Migration) for less risk
After importing, run a search-replace for old/new domains (WP-CLI or interconnect/it scripts)
Watch for serialized data errors, plugins can mangle this, so double-check widgets/menus
Static sites and Jamstack: CDN and build considerations
Sync build output to new host or CDN (Netlify, Vercel, Cloudflare)
Update build tools for new domains/asset paths if switching platforms
Ecommerce (WooCommerce, Shopify, Magento): orders, carts and payment gateways
Export/import orders and customer data before switching DNS
Test cart, checkout, and payment fully
Warn customers of upcoming maintenance to avoid abandoned carts
Control panels: cPanel/WHM, Plesk, DirectAdmin, step highlights
Each has backup/export and restore wizards. Use them.
For cPanel-to-cPanel, full backups are super smooth (shoutout Devoster for their hassle-free restore interface).
SEO, Google Search Console and Analytics Considerations
Don't let your SEO disappear with your old host. Handle this right, or risk vanishing from Google. (Spooky, right?)
How host changes can affect crawling and rankings
Temporary downtimes can drop rankings fast (Google hates inaccessible sites)
New server IP? Geo-change could impact local rankings
Search Console: re-verification, crawl errors, sitemap resubmission
Log in to Google Search Console, re-verify your ownership if DNS or root files changed
Watch for crawl or coverage errors after switching
Re-upload sitemaps to point bots to the right spots
Preserving SEO: redirects, canonical tags, and monitoring impressions
301 redirects for any changed URLs
Check canonical tags aren't hardcoded to the old host
Monitor Google impressions and traffic, use GSC and Analytics to spot sudden drops
I once saw traffic tank for a week after forgetting Search Console re-verification. (Ouch.)
Performance, CDN and Caching Best Practices After Switching Hosts
So you're live on the new host. Let's turbocharge…
Testing performance: load times, TTFB, synthetic vs real-user metrics
Use GTmetrix and Google PageSpeed Insights to baseline before/after
TTFB (Time To First Byte) reveals server-side slowness
Check both synthetic (lab) tests and real-user metrics (Core Web Vitals.)
CDN setup, caching rules, and invalidation during migration
Set up your CDN (Cloudflare's free plan is gold), link it to the new server
Update caching rules for static/dynamic content
Invalidate CDN cache after migration so users get the latest content
Page loads like a jet. You're welcome.
Security and Compliance: Hardening, Backups and Access Controls
Let's keep the hackers (and auditors) away.
File permissions, SSH keys, firewall and WAF configuration
Set proper file/folder permissions (644/755 standard for web files)
Use unique SSH keys for access (avoid password logins.)
Enable any server firewalls or Web Application Firewalls (WAF) in your new host's panel (Devoster, SiteGround, Kinsta all have WAF options)
Retaining backups and secure deletion of old hosting data
Store your backups in at least two places (cloud/local)
Double-check that nothing sensitive is left on your old host, delete files, DBs, and accounts securely
Request a final account closure confirmation from your old provider
Once lost a db backup by being lazy on cleanup, don't risk it.
Minimizing Downtime, Rollback Plans and Contingency Steps
Downtime hurts. (Your wallet, your ego, your inbox…)
Blue-green/staging approaches and DNS fallback strategies
Blue-green: Run old and new sites in parallel, switch DNS only when new site is 100%
Fallback: Keep old hosting live for 48–72 hours after DNS, just in case
Clear rollback checklist and how to revert safely
Keep backups and old DNS handy
Don't delete old hosting until the new one's tested AND users have zero issues
Document every major change, nothing is worse than relying on memory mid-freak-out
Safety nets matter, I've had to roll back entire sites after botched plugin migrations.
Post-Migration Checklist & Ongoing Monitoring
You did it, site's live. Don't peace out just yet…
Quick checks: pages, forms, redirects, SSL, email, analytics
Test all URLs
Try forms, logins, and password resets
Double-check redirects
Confirm SSL everywhere
Send test emails
Re-check analytics (Google Analytics, Matomo, etc.)
7- and 30-day monitoring plan: performance, errors, traffic, rankings
Day 1–7: Watch logs for errors, slow queries, and unexpected spikes
Day 1–30: Compare visitor stats, rankings, and error rates against pre-migration benchmarks
Take a deep breath…and check in weekly. Migration's a marathon, not a sprint.
Cost, Time Estimates and Migration Options
No two migrations are alike, but let's talk time and money.
DIY vs plugin vs paid migration service: pros and cons
| Method | Pros | Cons |
|---|---|---|
| DIY | Free, full control | Can be stressful, easy to miss steps |
| Plugin | Fast for WordPress, simple | Plugin compatibility, sometimes limits |
| Paid | Expert-led, minimal stress | Costs $50–$500, not instant, trust factor |
If you're busy, Devoster's paid migration will do the heavy lifting, and you can binge-watch cat videos instead.
Typical timelines and realistic time estimates by site complexity
Small site: 1–3 hours (including testing, mostly waiting on DNS)
Medium (CMS + email): 4–8 hours
Large ecommerce/site + app: 1–2 days (not non-stop, but lots of testing.)
Just keep snacks, water, and patience nearby.
Troubleshooting Common Problems After Switching Hosts
Even with best-laid plans, hiccups happen. Here's your first aid kit:
DNS propagation issues and how to verify
Propagation can take 1–48 hours. Use whatsmydns.net, dig, or nslookup to track updates. If you see old and new IPs mixed, relax, it's normal.
Database connection errors, 500/503 problems and log analysis
500/503? Check file permissions, PHP errors (error_log), and database credentials.
DB connection fails? Triple-check config files: check for host/username typos, DB privileges.
Use logs. cPanel, Devoster, or standalone servers all have easy-to-access logs.
Email delivery failures and SPF/DKIM/DMARC debugging
Emails going to spam or vanishing? Check that all records match your new host. Use tools like MXToolbox for diagnostics.
Sometimes a stubborn DNS cache just needs time. Calm, steady, and check those settings…
Remember: Every migration I've done has something weird. Expect the unexpected, laugh at the chaos, and enjoy that first ping when your site goes live.

Have questions? Get in touch
Not sure which plan fits or how crypto billing works for you? We're here to help.
Contact usFrequently Asked Questions About Changing Web Hosting Service
What are the main reasons to change web hosting service?
Common reasons to change web hosting service include poor performance, high renewal costs, lack of reliable support, security issues, and the need for better scalability as your website grows.
How do I switch web hosting without experiencing downtime?
To avoid downtime during a web hosting change, carefully back up all files and databases, prepare the new hosting environment, migrate content, update DNS settings during low-traffic hours, and thoroughly test your site before making the switch live.
What steps are involved in changing web hosting service?
The key steps to changing web hosting service include auditing your current site, backing up files and emails, setting up the new host, migrating files and databases, updating email and DNS records, configuring SSL, and testing your site before and after the move.
Will changing web hosting affect my SEO rankings?
Changing web hosting can impact SEO if not handled carefully. Temporary downtime, incorrect redirects, or missed analytics settings can lead to ranking drops. Always monitor site performance, re-verify Search Console, and update sitemaps after migrating.
Can I move my WordPress site to a new hosting provider easily?
Yes, migrating a WordPress site can be straightforward using dedicated plugins like Duplicator or All-in-One WP Migration, or by using your new host’s automated migration tools. Always backup first and test after migration to avoid issues.
When is the best time to change web hosting provider?
It's best to change web hosting during periods of low website traffic and after lowering your DNS TTL settings. This reduces the risk of user disruption and ensures a smoother DNS propagation after the switch.
Ready to Experience Devoster?
Join thousands of satisfied customers with transparent pricing and lightning-fast hosting.